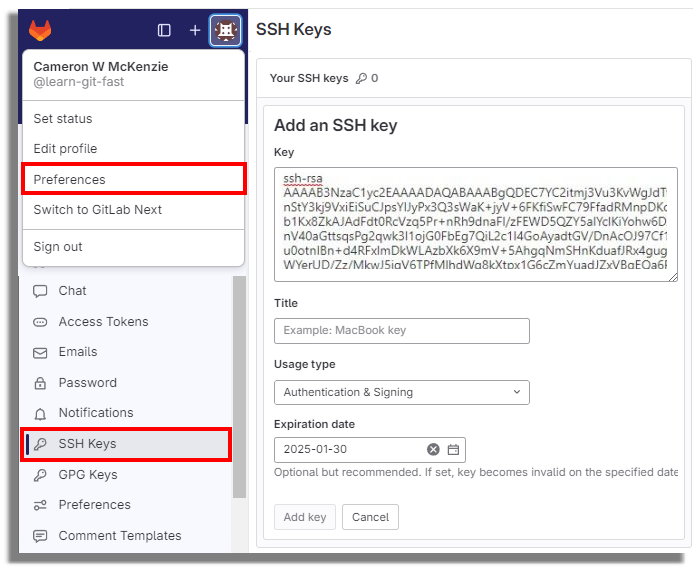
Setting up SSH keys is essential for secure server access. It’s a method many developers use to enhance security.
Secure Shell (SSH) keys provide a secure way to access remote systems. They eliminate the need for passwords, making the process both safer and more efficient. In this guide, you’ll learn how to set up SSH keys step-by-step. By the end, you’ll understand how to create and install SSH keys on your server, improving your workflow and security. This method is especially useful for those managing servers with services like Liquid Web. Their hosting solutions offer the perfect environment for utilizing SSH keys. Ready to enhance your security? Let’s get started on setting up SSH keys! For more information on managed hosting services, visit Liquid Web.

Credit: www.bastionxp.com
Introduction To Ssh Keys
SSH keys are a vital tool for secure access to servers. They provide a safe and efficient way to manage server access without relying on passwords.
What Are Ssh Keys?
SSH keys are pairs of cryptographic keys used for secure network services. They consist of a public key and a private key. The public key is placed on the server, while the private key remains with the user.
When the user tries to connect to the server, the server uses the public key to verify the user’s private key. This process ensures that the connection is secure and that the user is authenticated.
Why Use Ssh Keys?
There are several reasons to use SSH keys:
Enhanced Security: SSH keys are more secure than passwords. They are nearly impossible to guess or brute force.
Ease of Use: Once set up, SSH keys allow for passwordless logins, making the login process quicker and more convenient.
Automation: SSH keys are essential for automating tasks and scripts that require secure access to servers.
Flexibility: SSH keys can be used for various applications, including secure file transfers and remote server management.
Generating Ssh Keys
Creating SSH keys is essential for secure server communication. This guide will help you generate SSH keys efficiently and securely.
Choosing The Right Tool
Selecting the proper tool is crucial for generating SSH keys. Different tools offer different features.
Tool | Description | Platform |
|---|---|---|
OpenSSH | A common and widely used tool for SSH key generation. | Linux, macOS |
PuTTYgen | Popular SSH key generator for Windows users. | Windows |
ssh-keygen | Built-in tool for Linux and macOS users. | Linux, macOS |
Step-by-step Guide To Generating Keys
Follow these steps to generate SSH keys using ssh-keygen:
Open your terminal.
Type the following command and press Enter:
ssh-keygen -t rsa -b 4096 -C “your_email@example.com“
When prompted, specify the file to save the key (press Enter to accept the default location).
Enter and confirm a passphrase to secure your key.
Your SSH key pair is now generated. The public key is saved with a .pub extension.
Here’s a breakdown of the command:
-t rsa: Specifies the type of key to create, RSA.
-b 4096: Sets the key length to 4096 bits for added security.
-C “your_email@example.com“: Adds a label to the key for identification.
With these steps, you can easily generate SSH keys.
https://www.youtube.com/watch?v=33dEcCKGBO4
Configuring Ssh Keys On Your Local Machine
Setting up SSH keys on your local machine is a crucial step for secure and efficient access to your server. This guide will walk you through the process, ensuring your SSH keys are correctly configured and stored safely.
Adding Ssh Keys To Your Ssh Agent
To manage your SSH keys effectively, you need to add them to the SSH agent. This process helps cache your passphrase, so you don’t need to enter it every time you connect to a server.
First, start the SSH agent in the background by running the following command:
eval "$(ssh-agent -s)"Next, add your SSH private key to the SSH agent:
ssh-add ~/.ssh/id_rsa
The command ssh-add will prompt you for the passphrase of your private key. Once entered, the SSH agent will store your key for the duration of your session.
Storing Your Ssh Keys Securely
Keeping your SSH keys secure is paramount to maintaining the integrity of your connections. Here are some tips to ensure your keys are stored safely:
Use strong passphrases: Choose a complex passphrase for your private key to prevent unauthorized access.
Set correct permissions: Ensure your SSH key files have the proper permissions. Use the following commands:
chmod 600 ~/.ssh/id_rsachmod 644 ~/.ssh/id_rsa.pubBackup keys: Store a secure backup of your SSH keys in a safe location, such as an encrypted external drive.
Avoid sharing private keys: Never share your private key with anyone. Only the public key should be distributed.
By following these steps, you can ensure that your SSH keys are both accessible and secure, providing a seamless and safe way to access your servers.
Setting Up Ssh Keys On A Remote Server
Setting up SSH keys on a remote server enhances security and simplifies the login process. This guide will walk you through the essential steps to configure SSH keys for your server.
Copying Your Ssh Key To The Server
First, generate an SSH key pair on your local machine. Use the following command:
ssh-keygen -t rsa -b 4096 -C "your_email@example.com"Next, copy your SSH public key to the remote server. Use the ssh-copy-id command:
ssh-copy-id username@remote_hostReplace ‘username‘ with your remote server username and ‘remote_host‘ with your server’s IP address or hostname. The command will prompt you for your remote server password. Once authenticated, the SSH key will be copied.
Testing Your SSH Connection
After copying the SSH key, test the connection to ensure everything is set up correctly. Use the following command:
ssh username@remote_hostIf everything is configured correctly, you should be able to log in without entering a password. This confirms that SSH keys are set up correctly.
Remember, Liquid Web offers managed hosting solutions that support advanced security measures like SSH keys. Visit their website for more information.
Main Features | Benefits |
|---|---|
Managed Hosting Solutions | Reliable and fast hosting |
High Performance | Robust security features |
Security | Expert support is available anytime |
24/7/365 Support | Flexible and scalable solutions |
For any issues, Liquid Web offers 24/7/365 support. Their expert team is always ready to assist.
For more details, visit their website: Liquid Web.
Managing Ssh Keys
Managing SSH keys is crucial for maintaining server security and ensuring authorized access. Proper management includes revoking and removing old keys, as well as following best practices to keep your connections secure. Here’s how to handle these tasks effectively.
Revoking And Removing Ssh Keys
Revoking and removing SSH keys is essential when an employee leaves the company or a key is compromised. Follow these steps to revoke and remove SSH keys:
Locate the authorized_keys file: This file is typically found in the ~/.ssh/ directory.
Open the file: Use a text editor like Nano or Vim to edit the authorized_keys file.
Identify the key: Find the line containing the key you wish to remove.
Delete the key: Remove the entire line containing the SSH key.
Save and close: Save the changes and close the text editor.
By following these steps, you can ensure that old or compromised keys no longer have access to your server.
Best Practices For Ssh Key Management
Following best practices for SSH key management can enhance your server’s security. Here are some tips:
Use strong passphrases: Always set a strong passphrase for your SSH keys to add an extra layer of security.
Regularly rotate your SSH keys: Change them regularly to reduce the risk of unauthorized access.
Limit key permissions: Grant only the necessary permissions to each key. Avoid using root access if possible.
Monitor access: Regularly check who has access to your servers and remove any unnecessary keys.
Implementing these best practices will help you maintain a secure and efficient SSH key management system.
Credit: www.digitalocean.com
Troubleshooting Common Issues
Setting up SSH keys can sometimes present challenges. Here, we address common issues you may encounter and provide guidance on how to troubleshoot them.
Permission Denied Error
A common problem is the “Permission Denied” error. This usually means the server does not recognize your SSH key.
To resolve this issue:
Ensure your public key is added to the
~/.ssh/authorized_keysfile on the server.Check the permissions of the
~/.sshdirectory andauthorized_keysfile.
File/Directory | Correct Permissions |
|---|---|
|
|
|
|
Use the following commands to set the correct permissions:
chmod 700 ~/.ssh
chmod 600 ~/.ssh/authorized_keys
SSH Agent Forwarding Issues
Another issue you might encounter is with SSH agent forwarding. This allows you to use your local SSH keys on a remote server.
If agent forwarding is not working:
Ensure you have agent forwarding enabled in your SSH configuration:
Host
  ForwardAgent yes
Start the SSH agent on your local machine:
eval $(ssh-agent -s)Add your SSH key to the agent:
ssh-add ~/.ssh/id_rsaBy following these steps, you should be able to resolve most common SSH key setup issues.

Credit: www.theserverside.com
Frequently Asked Questions
How to Create an SSH Key on Terminal?
Open the terminal. Type ssh-keygen -t rsa -b 4096 -C "your_email@example. com" . Press Enter. Confirm file location and enter a passphrase.
How to Set Up SSH Keys Between Two Servers?
Generate SSH keys ssh-keygen on the source server. Copy the public key to the destination server using ssh-copy-id user@destination_server. Ensure proper permissions for the . Ssh directory and authorized_keys file on the destination server. Test SSH login for seamless access.
How to Register an SSH Key on a Server?
Upload your public SSH key to the server using the command ssh-copy-id user@server. Alternatively, manually add she to ~/. Ssh/authorized_keys on the server.
How to Set Up SSH on Terminal?
Open the terminal. Install OpenSSH with sudo apOpenSSHnstall openssh-client. Generate SSH keys using ssh-keygen. Add the key to the SSH agent with ssh-add ~/. ssh/id_rsa. Connect to a server with ssh user@hostname.
Conclusion
Setting up SSH keys boosts your security and simplifies server access. Follow the steps carefully for a smooth process. For reliable hosting solutions, consider Liquid Web Hosting Services. They offer high performance, security, and 24/7 support. Ideal for businesses requiring dependable and scalable hosting. Start securing your connections today!

